SNA Extended N-port and Full-N-port Calibration Steps
June 21, 2024
SNA is connected with SSM switch matrix to expand into N-port network analyzer. For example, vector network analyzer SNA5032A is expanded to 16 ports by using switch matrix SSM5124A, and perform full 16 ports calibration. The expansion process involves the following steps:
- Connect SNA5302A and SSM5124A through USB cable. Select System > External Ports > Ext Port Enabled. After VNA and SSM establish physical connection, contact Switch Matrix… menu to enter the interface of “Switch Matrix RF Connections” dialog box, with the configuration shown below.

2. Use ECal for full 16-port calibration and SEM5014 is adopted here.
1)Set SNA Start Frequency =1GHz, Stop Frequency = 6GHz
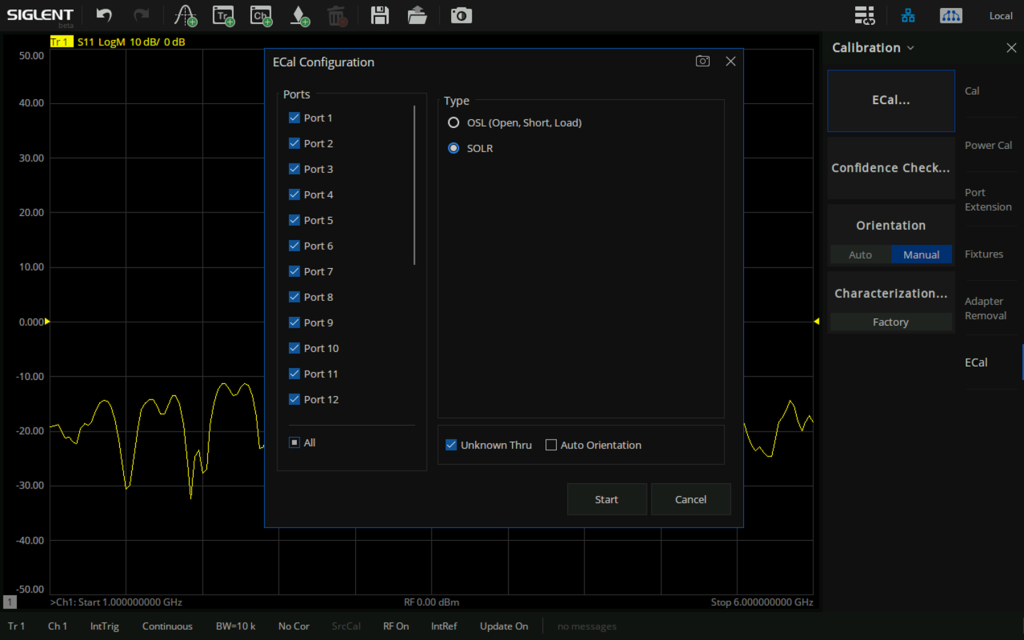
2)Connect SEM5014 and SNA5302A through USB cable. After SNA5302A prompts to identify SEM5014, press Cal > ECal > ECal… to enter the ECal Configuration interface. Select Port1 to Port16 ports. Perform Unknown Thru SOLR calibration as shown below.
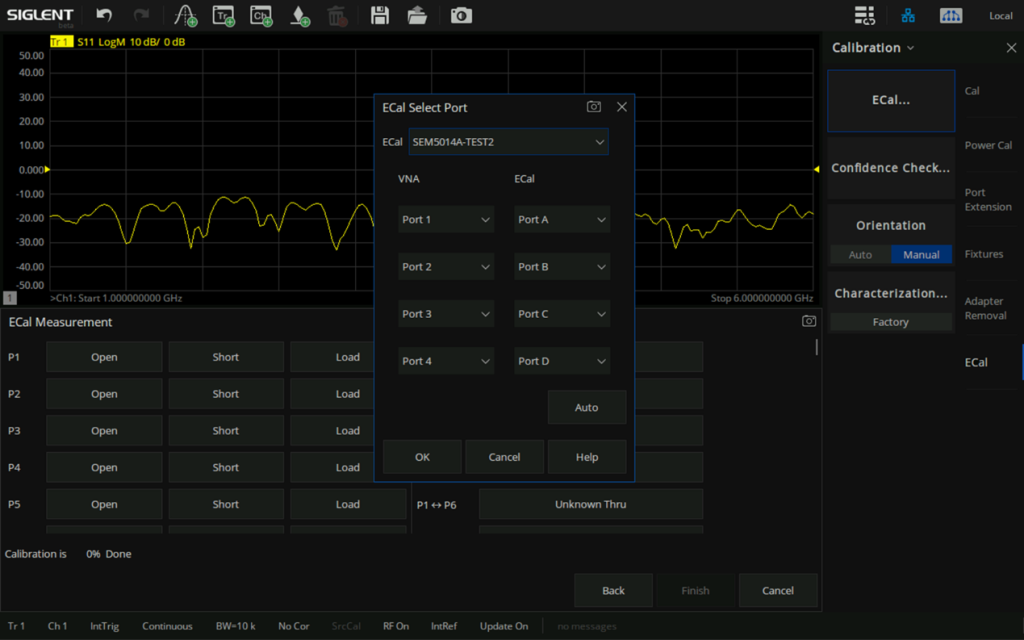
3)P1-P4 Calibration: Connect Ports 1, 2, 3 and 4 of matrix switch to Ports A, B, C and D of SEM5014 through SMA cables. Click OK and then click any calibration standard option of P1 (like Open/Short/Load) to start P1-P4 calibration as shown below.
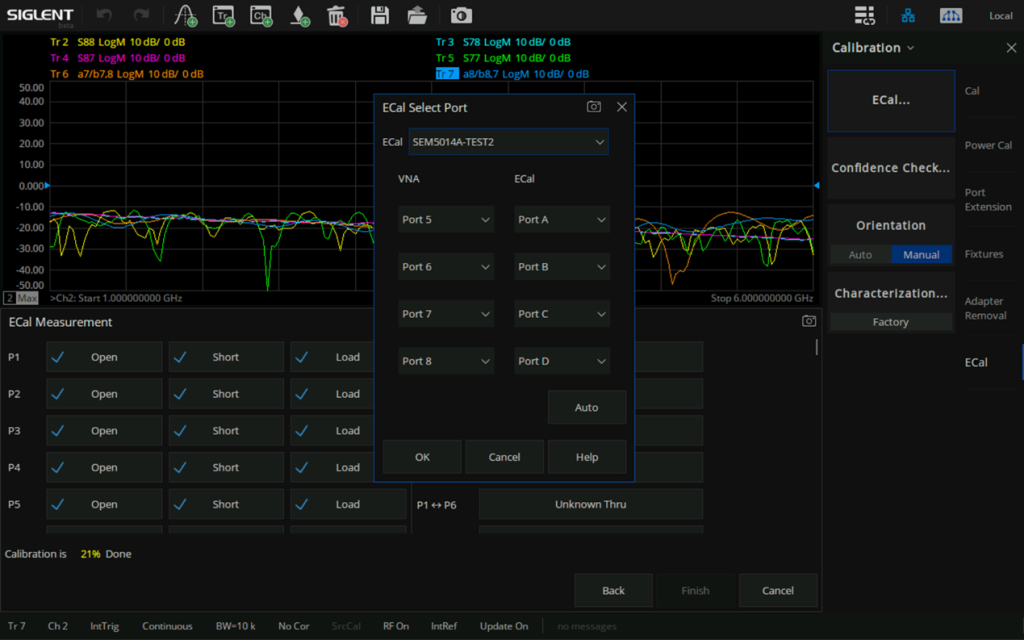
4)P5-P8 Calibration: Connect Ports 5, 6, 7 and 8 of matrix switch to Ports A, B, C and D of SEM5014 through SMA cables. Click OK and then click any calibration standard option of P5 (like Open/Short/Load) to start P5-P8 calibration as shown below.
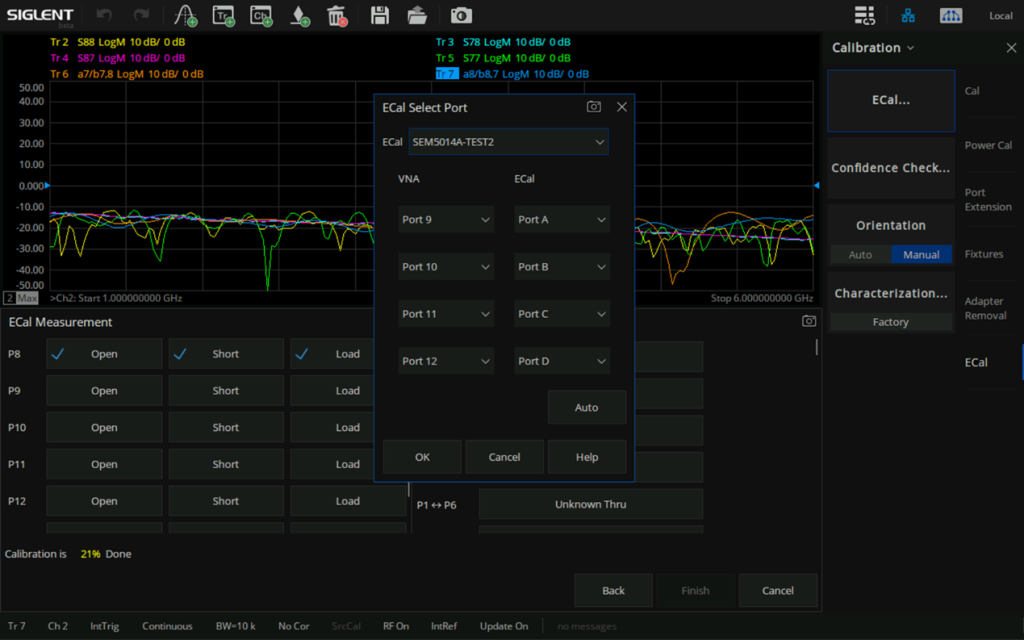
5)P9-P12 Calibration: Connect Ports 9, 10, 11 and 12 of matrix switch to Ports A, B, C and D of SEM5014 through SMA cables. Click OK and then click any calibration standard option of P9 (like Open/Short/Load) to start P9-P12 calibration as shown below.
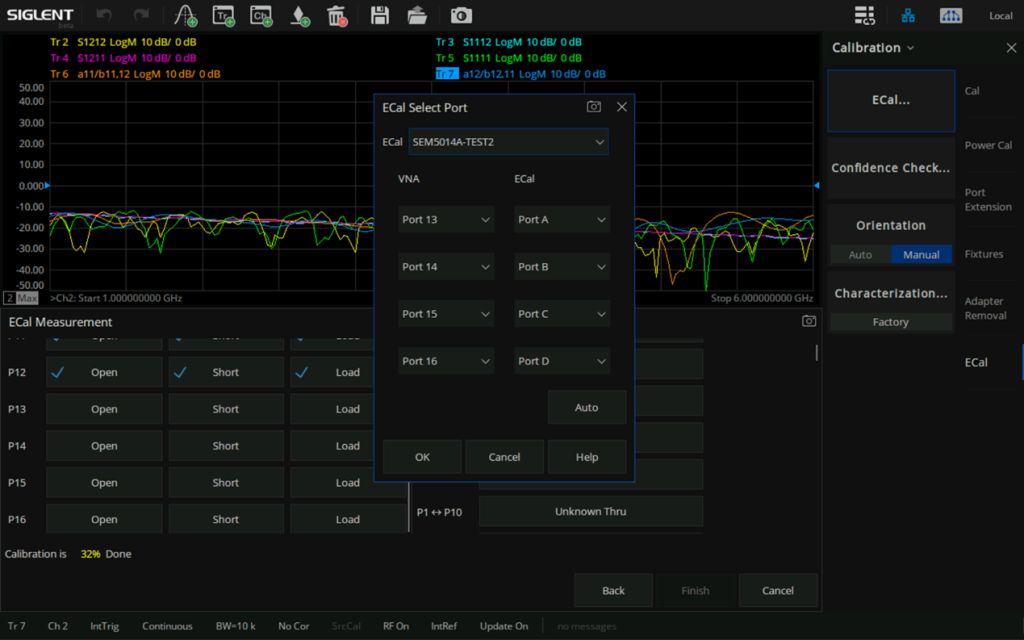
6)P13-P16 Calibration: Connect Ports 13, 14, 15 and 16 of matrix switch to Ports A, B, C and D of SEM5014 through SMA cables. Click OK and then click any calibration standard option of P13 (like Open/Short/Load) to start P13-P16 calibration as shown below.
7)After reflection calibration of P1-P4, P5-P8, P9-P12 and P13-P16 is completed, perform through calibration between each two groups. Select the five through items P1-P5, P1-P9, P1-P13, P5-P13, and P9-P13.
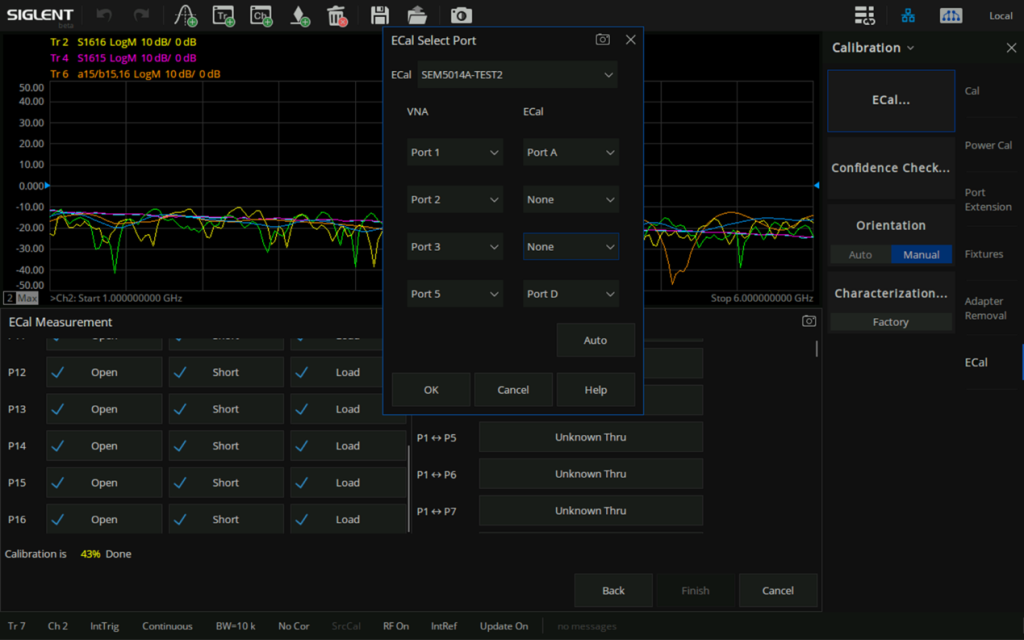
- P1-P5 Calibration: Connect Ports 1 and 5 of matrix switch to Ports A and D of SEM5014 through SMA cables. Click the P1-P5 Unknown thru tab on UI and set Port 1 corresponding to Port A of Ecal, Port 2 corresponding to None of Ecal, Port 3 corresponding to None of Ecal, and Port 5 corresponding to Port D of Ecal. Click OK to perform through calibration of P1-P5, as shown below.
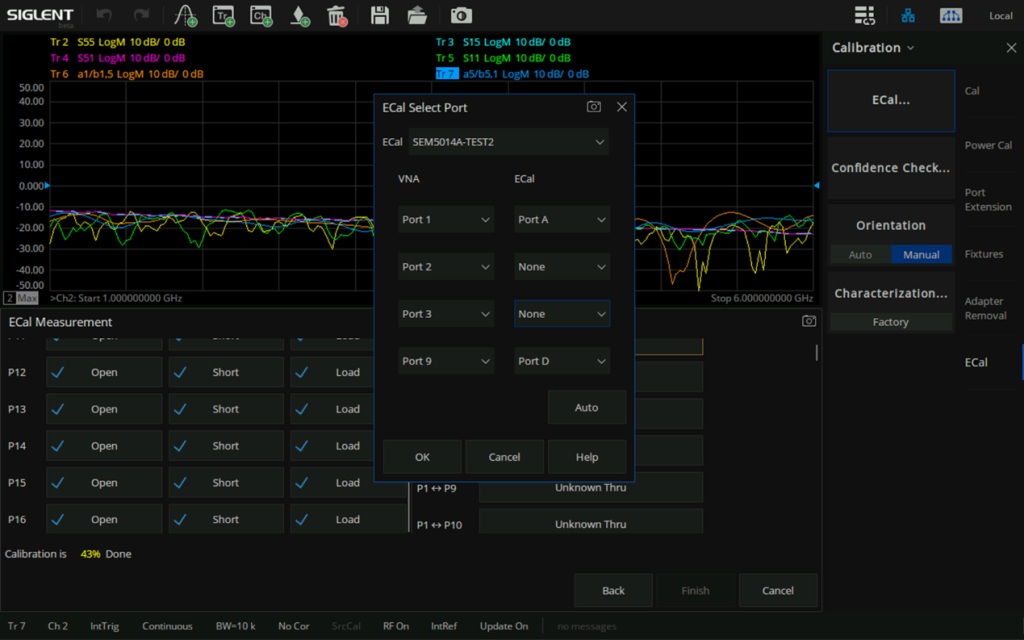
- P1-P9 Calibration: Connect Ports 1 and 9 of matrix switch to Ports A and D of SEM5014 through SMA cables. Click the P1-P9 Unknown thru tab on UI and set Port 1 corresponding to Port A of Ecal, Port 2 corresponding to None of Ecal, Port 3 corresponding to None of Ecal, and Port 9 corresponding to Port D of Ecal. Click OK to perform through calibration of P1-P9, as shown below.
- P1-P13 Calibration: Connect Ports 1 and 13 of matrix switch to Ports A and D of SEM5014 through SMA cables. Click the P1-P13 Unknown thru tab on UI and set Port 1 corresponding to Port A of Ecal, Port 2 corresponding to None of Ecal, Port 3 corresponding to None of Ecal, and Port 13 corresponding to Port D of Ecal. Click OK to perform through calibration of P1-P13, as shown below.

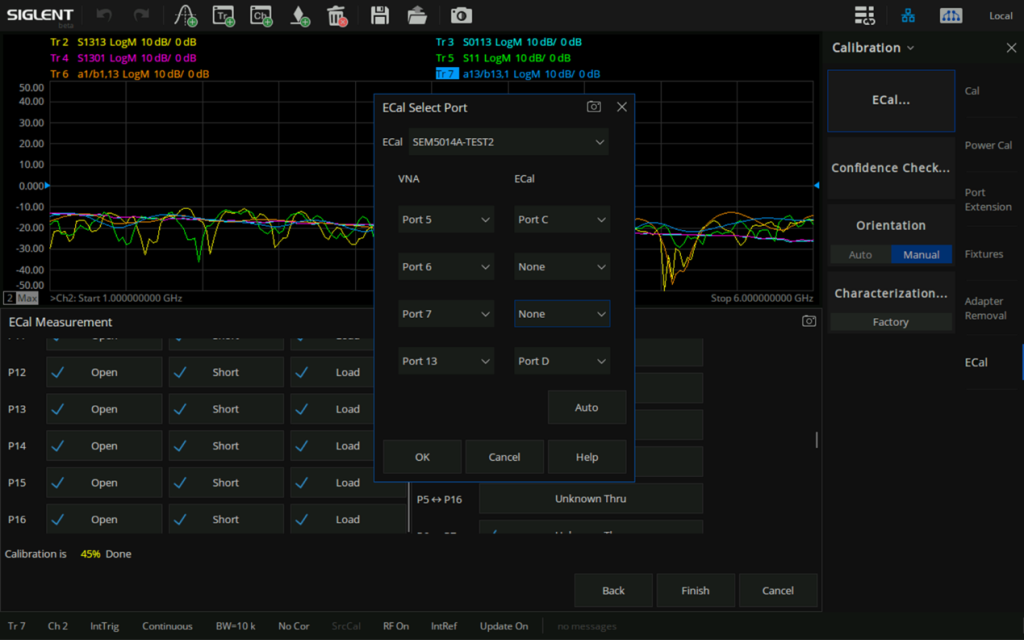
- P5-P13 Calibration: Connect Ports 5 and 13 of matrix switch to Ports C and D of SEM5014 through SMA cables. Click the P5-P13 Unknown thru tab on UI and set Port 5 corresponding to Port C of Ecal, Port 6 corresponding to None of Ecal, Port 7 corresponding to None of Ecal, and Port 13 corresponding to Port D of Ecal. Click OK to perform through calibration of P5-P13, as shown below.
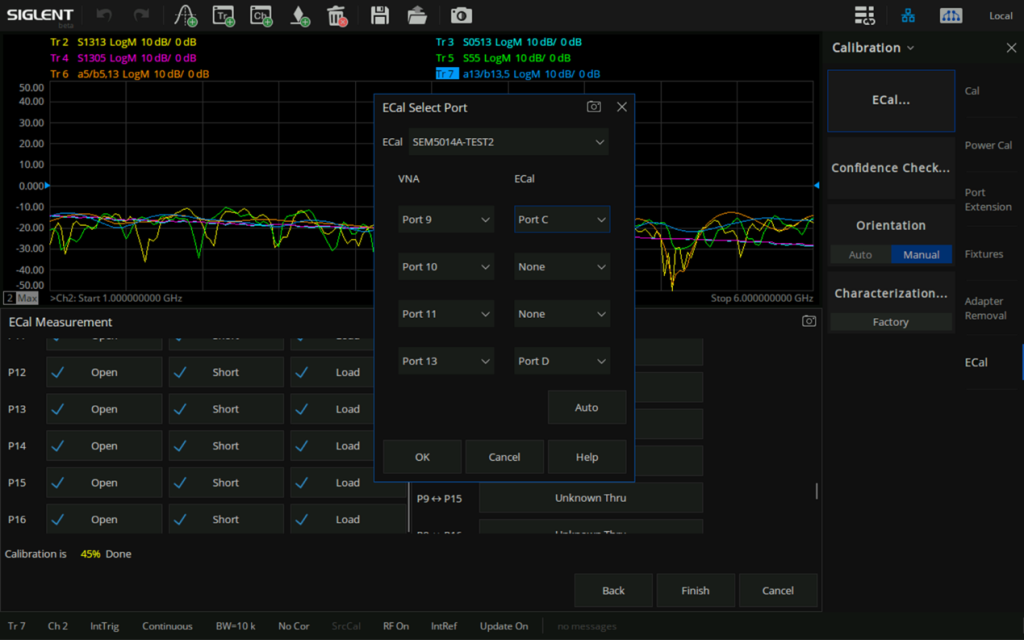
- P9-P13 Calibration: Connect Ports 9 and 13 of matrix switch to Ports C and D of SEM5014 through SMA cables. Click the P9-P13 Unknown thru tab on UI and set Port 9 corresponding to Port C of Ecal, Port 10 corresponding to None of Ecal, Port 11 corresponding to None of Ecal, and Port 13 corresponding to Port D of Ecal. Click OK to perform through calibration of P9-P13, as shown below.
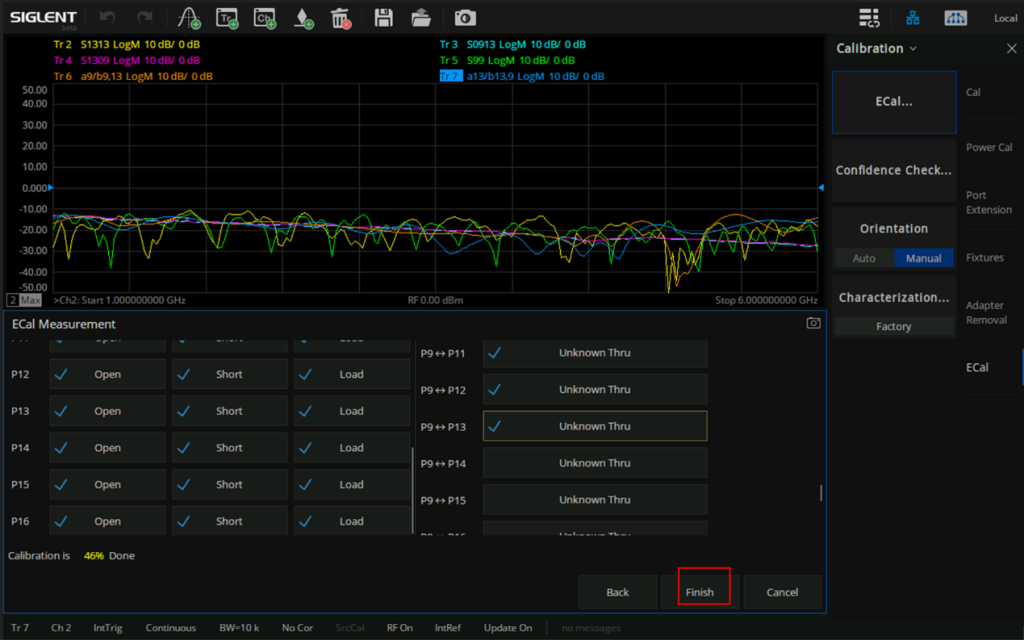
8)After completing the P9-P13 calibration, Finish will be highlighted on the UI. And then you can click Finish to end the full 16 ports calibration, as shown in the following figure.
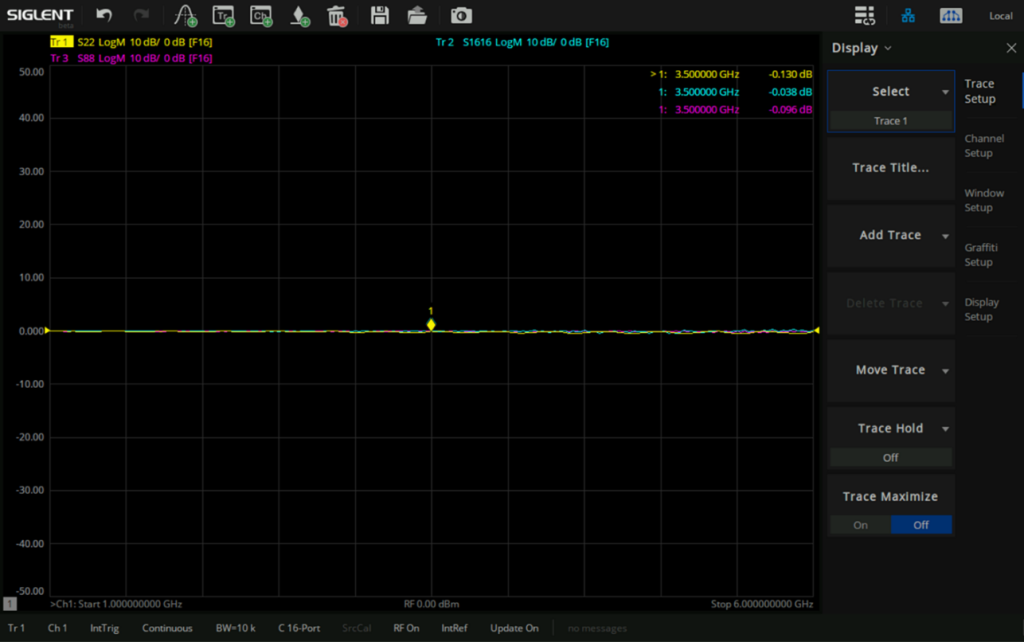
9)After calibration, you can add several traces and set S-parameter, such as S22, S88, S1616, to check the calibration effect, as shown in the following figure.